
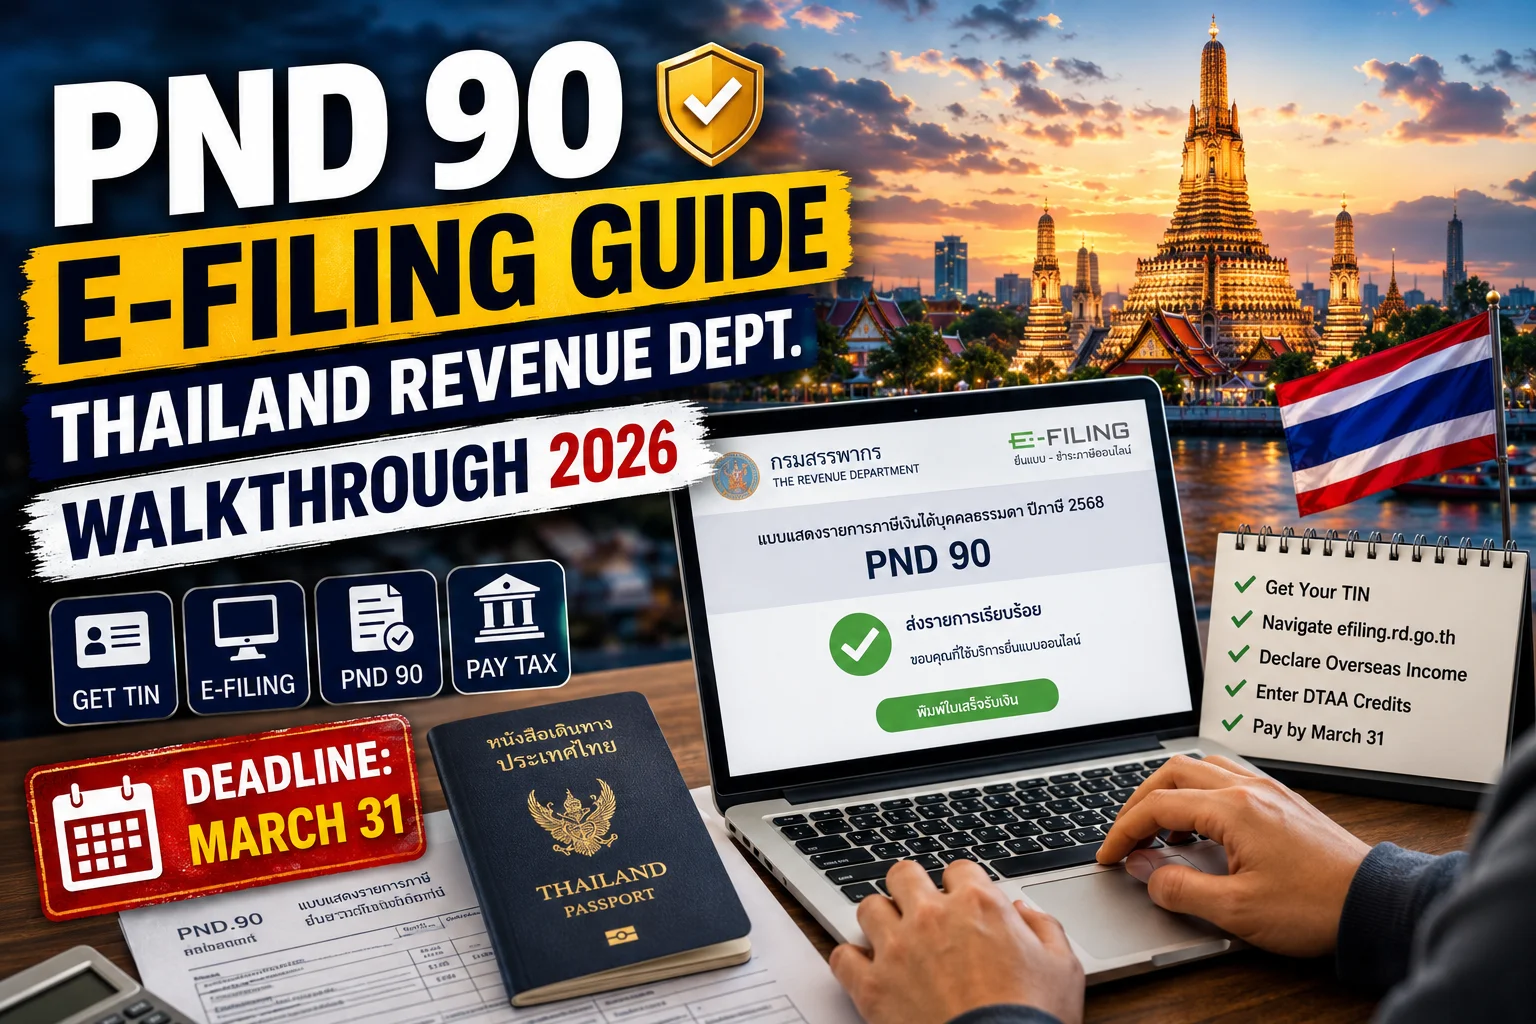
| DISCLAIMER This article provides general guidance on Thailand’s e-filing process based on the current portal structure as of June 2026. The Revenue Department updates the portal periodically; specific menu labels, field names, and screen layouts may differ from those described here. Always verify current portal instructions at rd.go.th/english. This is not tax advice. Engage a licensed Thai tax advisor for your first filing. |
| AI OVERVIEW SUMMARY Filing Thai personal income tax (PND 90) online as a digital nomad involves four preparation steps and seven portal actions. For Thailand PND 90 e-filing digital nomads, the process is: (1) obtain a Thai Tax ID (TIN) from a Revenue Dept. district office; (2) register at efiling.rd.go.th; (3) prepare your income documentation (Wise statement, bank statements, deduction receipts, DTAA credit documents); and (4) complete the PND 90 form section by section — declaring assessable overseas income under Revenue Code Section 40(1) (employment) or 40(8) (freelance/other), applying allowable deductions, entering any DTAA credit in the foreign tax credit field, and submitting. Deadline: March 31 of the year following the tax year. Late filing: file anyway — the penalty for late filing with payment is 1.5%/month surcharge, far less than the penalty for not filing. Payment methods: online banking linked in the RD portal (KBank, Bangkok Bank, Krungthai), bank counter, or QR code. The portal is primarily in Thai; use Chrome with auto-translate enabled for initial navigation. |
| QUICK ANSWER: How do I file PND 90 online as a digital nomad in Thailand? The complete filing sequence: Pre-step: Get Thai TIN from Revenue Dept. district office (passport + address proof)Step 1: Register at efiling.rd.go.th with your TINStep 2: Log in, select “Prepare Tax Return” and choose PND 90Step 3: Enter personal details (confirm auto-filled from TIN registration)Step 4: Declare income — Section 40(1) for salary OR Section 40(8) for freelance/platformStep 5: Enter deductions (personal allowance + income-type standard deduction + others)Step 6: Enter DTAA credit (if applicable) in foreign tax credit sectionStep 7: Review tax calculation, submit, and pay online Deadline: March 31. If you miss it: file late anyway. Late filing with payment penalty (1.5%/month) is far less than non-filing penalty (100–200% of tax due). |
Before You File: Getting Your Thai Tax Identification Number (TIN)
Every Thai tax filer needs a 13-digit Thai Tax Identification Number (TIN). If you have not obtained one yet, this is the first step. Without a TIN, you cannot register on the e-filing portal.
| HOW TO GET A THAI TIN AS A FOREIGNER Visit your nearest Revenue Department district office. In Bangkok, there are offices in most major districts. Well-known foreigner-accessible offices: Huay Kwang Revenue Dept. (serves central-north Bangkok; popular with expats)Ratchathewi Revenue Dept. (central Bangkok)Wattana Revenue Dept. (Sukhumvit area; high English support)Chiang Mai Revenue Dept. (regional office for Chiang Mai nomads) Documents to bring: Original passport (required) + one photocopy of the photo pageProof of Thai address: TM30 (residence notification) is ideal; alternatively, your rental contract, utility bill in your name, or a letter from your landlord/condo management on letterheadSome offices request a passport-sized photograph; bring one to avoid delays Process at the counter: Take a queue number at the foreign affairs counter (if available) or general counterStaff complete TIN registration form with your detailsTIN issued and recorded: you receive a document with your 13-digit TINTime: typically 20–60 minutes including queue time on a quiet day After receiving your TIN: photograph or scan the TIN document. You will need the 13-digit number for portal registration and every subsequent filing. |
| TIMING: WHEN TO GET YOUR TIN Get your TIN mid-year if you realize you will exceed 180 days in Thailand by December 31. Do not wait until January or February — Revenue Dept. offices are extremely busy January through March as nomads and expats rush before the filing deadline. A June-to-September TIN acquisition avoids the rush entirely. |
Portal Registration: Setting Up Your efiling.rd.go.th Account
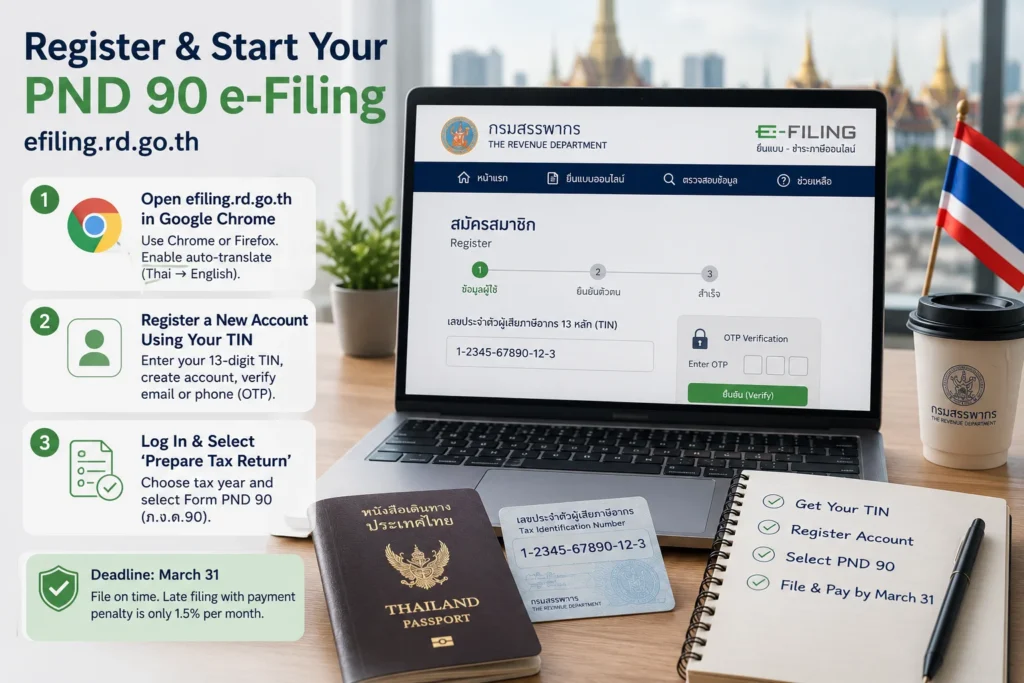
| STEP 1 | Open efiling.rd.go.th in Google Chrome The Thai Revenue Department e-filing portal is at efiling.rd.go.th. Use Google Chrome or Mozilla Firefox. Safari compatibility is inconsistent and may cause form submission errors. Enable Chrome’s automatic translation (Thai → English) for initial navigation: right-click anywhere on the page and select ‘Translate to English.’ ⚡ The auto-translation is imperfect but sufficient to navigate the portal. Key terms: ‘ยื่นแบบ’ = file/submit form; ‘แบบ ภ.ง.ด.90’ = PND 90 form; ‘ภาษีเงินได้บุคคลธรรมดา’ = personal income tax. |
| STEP 2 | Register a new account using your TIN On the efiling.rd.go.th homepage: select the registration option (สมัครสมาชิก / Register). Enter your 13-digit Thai TIN. Enter your name as it appears on your Revenue Dept. TIN registration. Create a username and password. Verify your email address or phone number via OTP (one-time password). ⚡ Your name in the portal must match exactly what is on your TIN registration at the Revenue Dept. If there is a mismatch (e.g., middle name included or excluded), registration will fail. If this happens: visit your Revenue Dept. office to confirm the exact registered name format. |
| STEP 3 | Log in and select ‘Prepare Tax Return’ After account creation, log in at efiling.rd.go.th with your username and password. On the dashboard: look for the option to prepare or submit a tax return (‘ยื่นแบบออนไลน์’ or ‘เตรียมข้อมูล’). Select the tax year and form type: Form PND 90 (ภ.ง.ด.90). The form opens as an online wizard. ⚡ If you see both PND 90 and PND 91 options: select PND 90. Almost all digital nomads with overseas income must use PND 90. PND 91 is for Thai employees with exclusively Thai employer salary income. |
PND 90: Section-by-Section Walkthrough
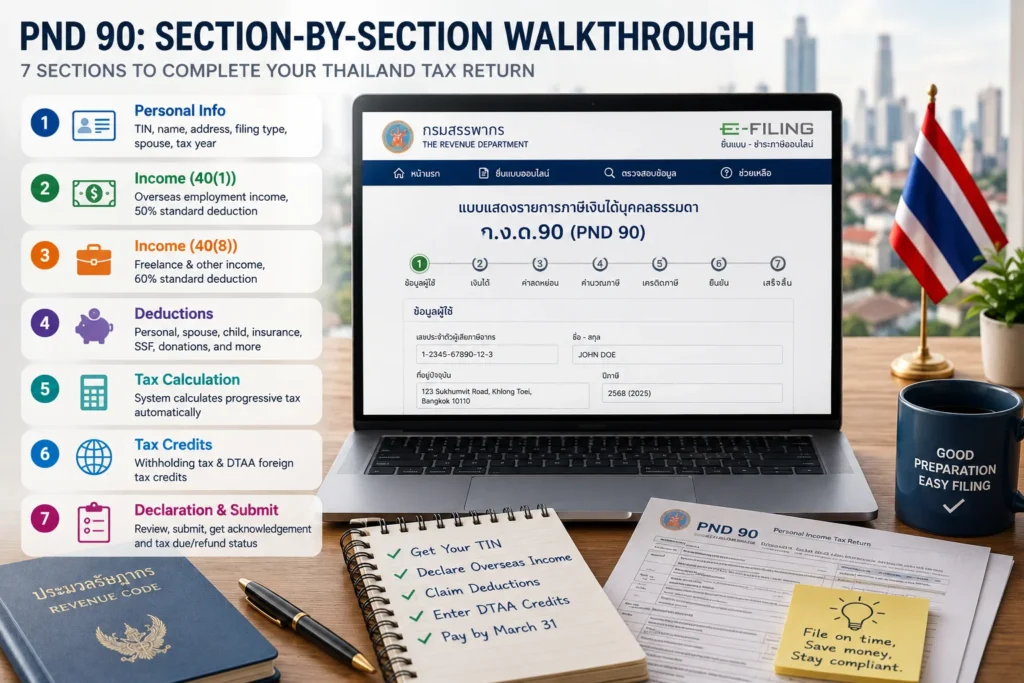
The PND 90 form is organized in sections. Work through each section sequentially. The portal calculates tax automatically as you enter data.
| SECTION 1 Personal Info | TIN auto-populated from account registration Full name: confirm matches TIN registration Address in Thailand: enter current Thai address Filing type: Select Individual (‘บุคคลธรรมดา’)Spouse filing: For joint filing if married (เลือกยื่นร่วมคู่สมรส)Tax year: confirm the year being filed ⚡ Address must be a current Thai address, not your home country address. Use your rental address or service apartment address. |
| SECTION 2 Income (40(1)) | Section 40(1): Employment income (เงินได้ตามมาตรา 40(1))For overseas salary: enter total assessable overseas salary brought into Thailand in same year earned Enter gross income amount in THB (convert from USD using exchange rate on date of each receipt)Standard deduction: system applies 50%, max THB 100,000 automatically Or actual expenses: if claiming actual instead of standard, document is required ⚡ If you received overseas salary but are a freelancer (no employment contract): use Section 40(8) instead. The income type should match your actual relationship with the payer. |
| SECTION 3 Income (40(8)) | Section 40(8): Other income (เงินได้ตามมาตรา 40(8))For overseas freelance income, Upwork/Fiverr platform income, consulting fees Enter total assessable overseas income brought into Thailand same year as gross amount in THB Standard deduction: 60% (no cap) — system applies automatically for this section Or actual documented business expenses: if actual > 60% standard, document each expense ⚡ The 60% standard deduction for Section 40(8) is significant. At THB 1,200,000 freelance income: THB 720,000 deducted automatically. Only THB 480,000 becomes assessable income before personal allowances. |
| SECTION 4 Deductions | Personal allowance: THB 60,000 (auto-applied)Spouse allowance: THB 60,000 (if applicable; enter spouse TIN)Child allowance: THB 30,000 per qualifying child Life insurance premiums: enter amount paid (up to THB 100,000)Health insurance premiums: enter amount paid (up to THB 25,000)SSF contributions: enter amount (up to 30% of income, max THB 200,000)Charitable donations: enter amount (up to 10% of net income after other deductions) ⚡ Do not skip the insurance premium deductions. If you paid an international health insurance plan in Thailand (required for LTR Visa), the premium qualifies as a deductible. Bring your policy certificate and premium receipt. |
| SECTION 5 Tax Calculation | Progressive tax calculated automatically by the system Net assessable income = gross income − Section deduction − personal deductions Tax applied at: 0% on first THB 150,000; 5% on 150,001–300,000; 10% on 300,001–500,000; 15% on 500,001–750,000; 20% on 750,001–1,000,000; 25% on 1,000,001– 2,000,000; 30% on 2,000,001–5,000,000; 35% above 5,000,000Review this section carefully before proceeding. Verify net assessable income matches your manual calculation. ⚡ Screenshot or print the tax calculation summary at this stage for your records before submitting. |
| SECTION 6 Tax Credits | Withholding tax credit: if any Thai employer deducted withholding tax (PND 1 certificates); enter amount here Foreign tax credit (DTAA): this is the field for claiming DTAA treaty credits For Indian resident citizens (not NRIs) claiming India-Thailand DTAA credit: enter Indian tax paid on same income in THB equivalent For Philippine resident citizens claiming Philippines-Thailand treaty credit: enter Philippine income tax paid on same income in THB equivalent Credit reduces tax payable: if credits exceed tax due, refund is available ⚡ DTAA credit documentation: have your home-country tax payment certificate ready to upload or present. For Indian filers: ITR acknowledgement + Form 26AS. For Filipino filers: BIR 1701 acknowledgement + BIR payment receipt. |
| SECTION 7 Declaration & Submit | Review all entered information Declaration checkbox: confirms accuracy of information Submit button: final submission of PND 90Acknowledgement number: note this down and screenshot it — this is proof of filing Email confirmation: sent to registered email address Tax due or refund: displayed after submission ⚡ After submission, the portal shows whether you have tax to pay or are due a refund. If tax is due: the system shows payment options. If overpaid (withholding credits exceed tax): refund is processed by Revenue Dept., typically within 3–6 months. |
Paying Your Thai Tax After Submission
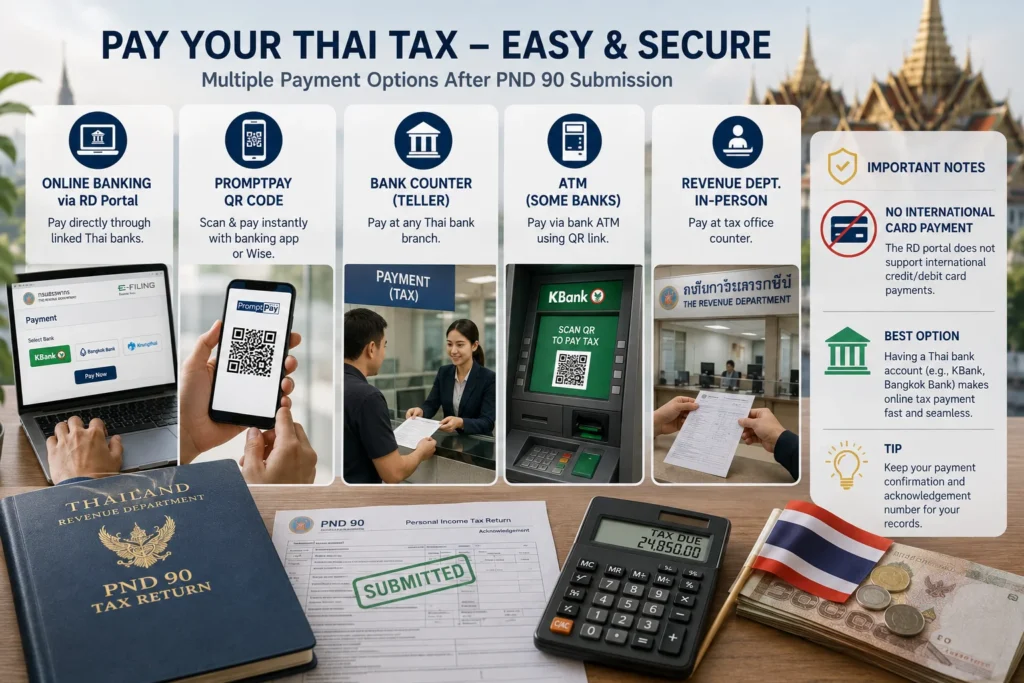
After submitting PND 90, if tax is due, payment can be made through several channels:
| Payment Method | How | Timeline | Notes |
| Online banking via RD portal | After submission, portal redirects to linked bank payment. KBank, Bangkok Bank, Krungthai, Krungsri, CIMB Thai supported | Immediate | Most convenient for nomads with Thai bank accounts |
| PromptPay QR code | Portal generates QR code; scan with Thai banking app or Wise app | Immediate | Works if your bank/Wise supports QR PromptPay scanning |
| Bank counter (teller) | Print or show PND 90 acknowledgement at any major Thai bank branch | Same day | Use if online payment fails; bring TIN and acknowledgement number |
| ATM (some banks) | KBank ATMs support tax payment via K PLUS app QR link | Same day | Check your bank’s ATM menu; not all branches support tax payment |
| Revenue Dept. in-person | Pay at the tax office counter on submission day | Same day | If filing in-person; also works if online portal payment fails |
| INTERNATIONAL CARD PAYMENT REALITY The Thai Revenue Department portal does not support direct international credit or debit card payment in the same way Thai bank cards work. If you do not have a Thai bank account (KBank, Bangkok Bank, etc.) linked in the portal, your options are: QR code via Wise app (if supported), bank counter payment, or in-person Revenue Dept. payment. This is the strongest practical reason to have a Thai bank account active before the filing season: it enables seamless online tax payment from the portal. See the Thailand Banking Guide for how to open a KBank or Bangkok Bank account as a nomad. |
Entering DTAA Credits: Indian and Filipino Nomad Guide
| DTAA CREDIT IN PND 90 — FOR INDIAN NOMADS Who needs this: Indian nomads who are Indian residents (NOT NRIs) — i.e., spent over 182 days in India in the financial year AND are also Thai tax residents. In this scenario, India taxes worldwide income AND Thailand taxes assessable overseas income: potential double taxation. Where in PND 90: Section 6 (Tax Credits). Look for the foreign income tax credit field (‘เครดิตภาษีเงินได้ที่เสียในต่างประเทศ’ / credit for tax paid overseas). What to enter: The amount of Indian income tax paid on the same overseas income that Thailand has also taxed. Convert Indian tax amount to THB at the exchange rate on the date of Indian tax payment. Documentation: Attach or present Indian ITR acknowledgement + Form 16A (for TDS) or advance tax payment challan as evidence of Indian tax paid. For Indian NRIs: India does not tax overseas active income. You are unlikely to have Indian tax paid on the same overseas income that Thailand has taxed. The foreign tax credit field in PND 90 is typically left blank for NRIs on overseas employment/freelance income. DTAA is still relevant but the credit claim is not. |
| DTAA CREDIT IN PND 90 — FOR FILIPINO NOMADS Who needs this: Filipino nomads who are Philippine resident citizens — BIR taxes worldwide income on your Philippine return. If you also owe Thai income tax on the same income as a Thai tax resident, there is potential double taxation on that same income. Standard approach: Philippine resident citizens typically claim the treaty credit on their BIR 1701 (Philippine return claims credit for Thai PND 90 taxes paid) rather than the Thai return claiming credit for Philippine taxes. File PND 90 first (March 31), then claim Philippine BIR credit using PND 90 acknowledgement (April 15 BIR deadline). If claiming in PND 90: In Section 6, enter Philippine income tax paid on the same income in THB equivalent. Documentation: BIR 1701 acknowledgement + BIR payment receipt. Most Filipino nomads: foreign tax credit in PND 90 is rarely used. The standard approach is to use the BIR return to claim credit for Thai taxes. Confirm with a Thai and Philippine CPA which direction the credit flows best in your specific case. |
Missing the March 31 Deadline: What to Do
| WHAT TO DO IF YOU MISS THE MARCH 31 DEADLINE Missing the deadline does not mean you should stop and not file. Filing late is significantly better than not filing at all. Penalty comparison: Filed on time, tax paid on time: No penaltyFiled on time, tax paid late: 1.5% per month surcharge on unpaid tax (max 20%)Filed late (after March 31) but with tax payment: 1.5% per month surcharge + possible 100% penalty (waivable if voluntary disclosure)NOT FILED at all, discovered on audit: 100–200% penalty on unpaid tax + 1.5%/month surcharge + possible criminal action for willful evasion Practical steps if you miss the deadline: File PND 90 at your Revenue Dept. district office in person as soon as possible after the deadline. Online portal late filing availability: varies; in-person is more reliable for late submissions.Bring all documentation. The Revenue Dept. officer will calculate the surcharge based on days late.Pay the tax due plus the calculated surcharge at the counter or bank.Obtain receipt and acknowledgement. Keep for your records and home-country DTAA credit documentation. The Revenue Dept. generally accommodates late voluntary filers without criminal prosecution. The key is voluntary disclosure — filing before being notified of an audit or inquiry. |
Filing In-Person: The Alternative for First-Year Filers
For nomads who find the online portal challenging or are filing for the first time, in-person filing at a Revenue Department district office is a fully valid alternative. The process:
- Obtain a paper PND 90 form from the Revenue Dept. office (available at the counter or downloadable from rd.go.th).
- Complete the form: enter your TIN, personal details, income by Section, deductions, and DTAA credits. Bring a completed Wise statement and bank records for reference.
- Present the form at the submission counter with your passport and TIN document.
- Revenue Dept. staff will review and calculate tax. If errors: they will guide you to correct them on the spot.
- Pay any tax due at the designated payment counter or linked bank counter at the office.
- Receive acknowledgement stamp on your paper PND 90 copy. Keep this as your filing proof.
| IN-PERSON FILING: TIPS FOR NOMADS Go in January or February, not late March. The weeks immediately before March 31 are extremely crowded at all Revenue Dept. offices. Queue times of 3–4 hours are common in the last week of March. English support: Varies significantly by office. Wattana district office (Sukhumvit area) typically has the best English support for foreign filers. Bring a translation app as backup. Bring a Thai-speaking friend or use a Thai tax advisor for first-time in-person filing if your Thai language ability is limited. The forms are in Thai and while staff will help, the process is faster with language support. |
Common Filing Mistakes to Avoid
| Mistake | Consequence | Prevention |
| Using PND 91 instead of PND 90 for overseas income | Form resubmission required; potential delay | Always use PND 90 for any overseas income, freelance income, or multiple income types |
| Declaring all overseas income (including non-assessable offshore amounts) instead of only what was transferred to Thailand | Overpaying tax | Identify assessable income first (D3 guide). Only declare overseas income actually brought into Thailand in same year earned |
| Not claiming the 60% Section 40(8) standard deduction for freelance income | Significant tax overpayment | System should apply automatically; verify the deduction is showing in the calculation summary before submitting |
| Using the wrong exchange rate to convert USD income to THB | Incorrect income declaration | Use RBI or BOT reference exchange rate on the date of each income receipt. Wise exports transactions in original currency; multiply each transfer by the exchange rate on that date |
| Missing the March 31 filing deadline without following up | Large non-filing penalties | File late in person if the portal deadline has passed. Late voluntary filing carries smaller penalties than non-filing |
| Not keeping the filing acknowledgement number | Cannot prove compliance; complicates DTAA credit claims in home country | Screenshot or print the acknowledgement page immediately after submission |
Frequently Asked Questions
How do I file PND 90 online as a digital nomad in Thailand?
Get a Thai TIN from your local Revenue Dept. district office (passport + address proof, same-day issuance). Register at efiling.rd.go.th with your TIN. Log in, select PND 90, and complete each section: personal details, income by Revenue Code Section (40(1) for salary or 40(8) for freelance), deductions, DTAA credits if applicable. Submit by March 31. Pay via linked Thai bank, QR code, or bank counter.
What is the e-filing portal for Thai taxes?
The Thailand Revenue Department e-filing portal is at efiling.rd.go.th. Register with your 13-digit Thai Tax Identification Number (TIN). The portal is primarily in Thai; use Chrome with auto-translate for English navigation. Supported browsers: Chrome and Firefox. Safari compatibility is inconsistent.
How do I get a Thai Tax Identification Number (TIN) as a foreigner?
Visit a Revenue Department district office in your area. Bring: original passport, one passport photocopy, and Thai address proof (TM30 ‘residence notification,’ rental contract, or utility bill). The TIN is issued the same day, typically within 30–60 minutes. In Bangkok, the Wattana and Huay Kwang district offices have the most experience with foreign filers.
What is the difference between PND 90 and PND 91?
PND 90 covers all income types (Sections 40(1)–40(8)) and is required for any nomad with overseas income, freelance income, or multiple income types. PND 91 is a simpler form for people with EXCLUSIVELY Thai employer salary income under Section 40(1) with no other income. Almost all digital nomads should use PND 90.
What happens if I miss the March 31 filing deadline?
File as soon as possible after the deadline, in person at your Revenue Dept. district office. Late voluntary filing carries a 1.5% per month surcharge on unpaid tax (up to 20% maximum). Not filing at all and being discovered on audit carries penalties of 100–200% of unpaid tax plus the monthly surcharge. Filing late is always better than not filing.
Final Verdict: The Portal Is Manageable — Prepare Before January
| The Thailand Revenue Department e-filing portal is not a modern, intuitive platform. It is a functional government system in Thai that requires Chrome auto-translation and some patience. The good news: the logic of the form is straightforward once you understand the income classification and deduction structure from the preceding guides in this cluster. The most important preparation is not technical — it is documentary. The Wise 12-month export, KBank/Bangkok Bank statements, deduction receipts, and any DTAA documentation should be organized before January of the filing year. Sitting down to file with all documents ready turns a potentially stressful experience into a manageable 2-3 hour process. For first-year filers: consider engaging a Thai tax advisor who works with expats for the initial filing. Fees of THB 5,000–15,000 are typical for a straightforward nomad return. The investment in correct first-year filing pays forward in understanding the process for subsequent self-filing years. Read the How to Report Foreign Income in Thailand guide (companion to this article) for income classification and deduction calculation before opening the portal. Both guides together give the complete filing workflow. |